Bitatek OTA server introduction
1. Introduction
This document is the design spec of Bitatek OTA firmware update OTA server.
2. Bitatek OTA firmware update system structure
2.1.

ET5001
OTA
client

Management
System
System structure
|
ET5001 OTA client |
|
Management System |
3. Management user interface
There's a management user interface
for OS image maintenance, this sector will descript the detail operating steps
for this interface.
3.1.1. Register an account
You can
register a account for managing your device OS images.
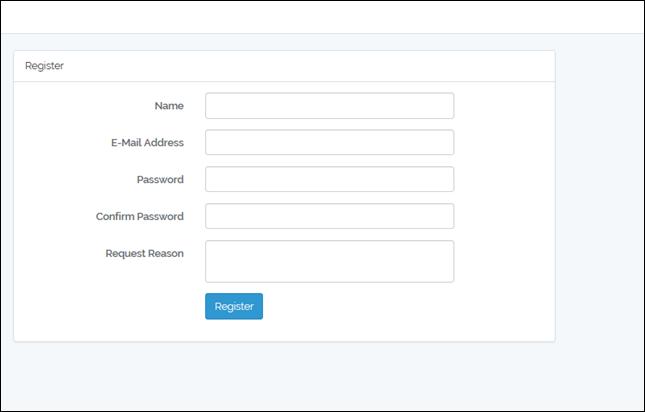
It will
takes 2~3 days for verifying your account. Then you will have access right to
mange you device OS images.
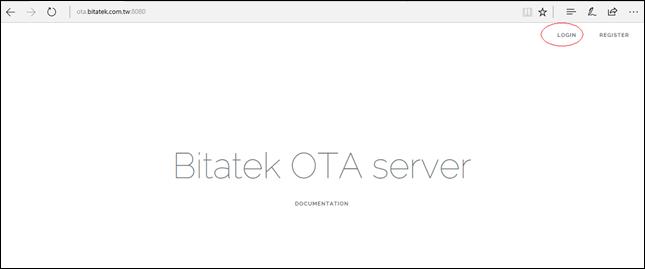
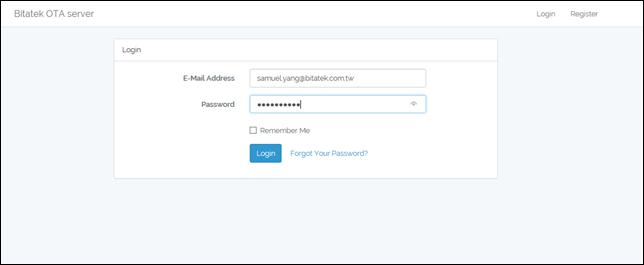
3.1.2. Login
OTA management URL is
https://ota.bitatek.com.tw:8080
You can press "LOGIN" to login
OTA management system.
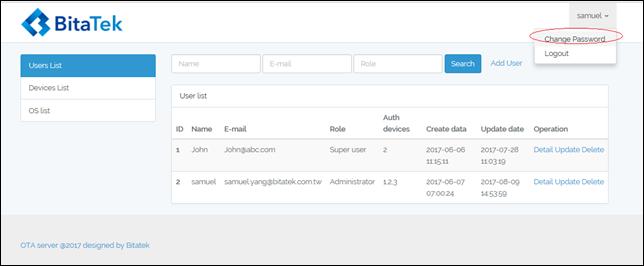
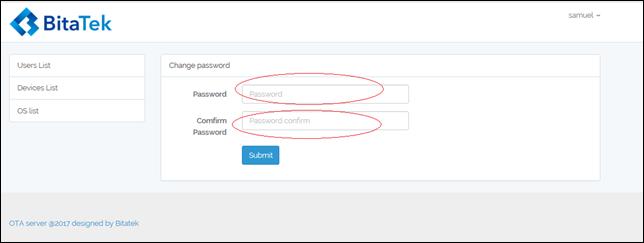
3.1.3. Change password
User can change login password.
3.1.4. Manage OS
Users can add/update/delete OS. Users can only access those devices that
they have access right defined in user's auth devices field.
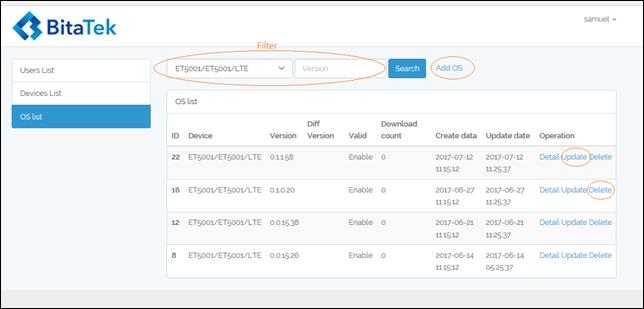
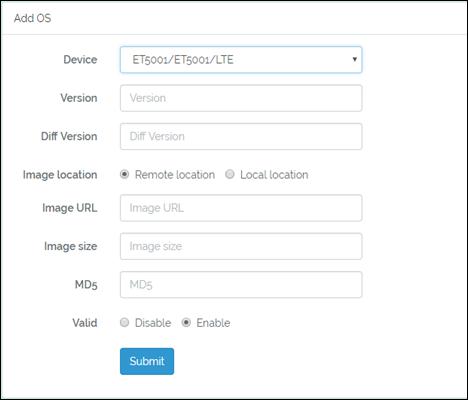
Add OS:
|
Fields |
Description |
Example |
|
Device |
Product
code/Model name/SKU to add OS image |
Ex: ET5001/ET5001/LTE |
|
Version |
OS image version |
Ex: 1.0.0.0 |
|
Diff version |
Differential OS image version |
Ex:0.9.0.0 |
|
Image location |
Remote or Local location |
|
|
Image
URL |
Image
download address |
Ex: http://aa.bb.cc/dd.zip |
|
Image
size |
Image
size in KB |
Ex: 10231421 |
|
MD5 |
Image
MD5 |
Ex:1234567890123453425313143 |
|
Valid |
Image
disable or enable |
|
*Diff Version: If your OS upgrade image is
specified for some Version, you can assign this field.
*You can put OS image in remote location
or local location. If you put OS image in local location, system will calculate
image size and MD5 automatically. If you put OS upgrade image file in remote
location, you have to fill up image URL, image size and MD5 according to your
OS upgrade image file.
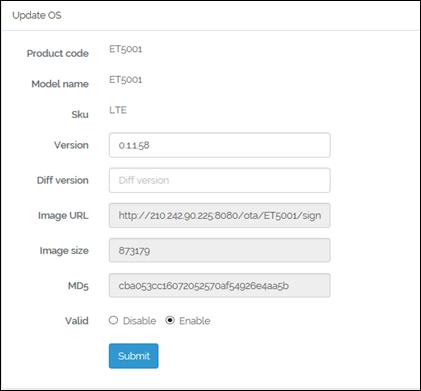
Update OS information:
Update information of exists OS
upgrade image file. User interface is similar to Create OS.
Delete OS:
Just press Delete button to delete
related OS upgrade image file.
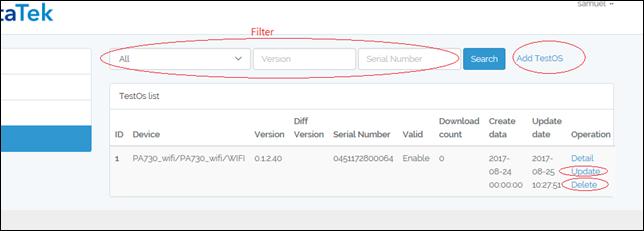
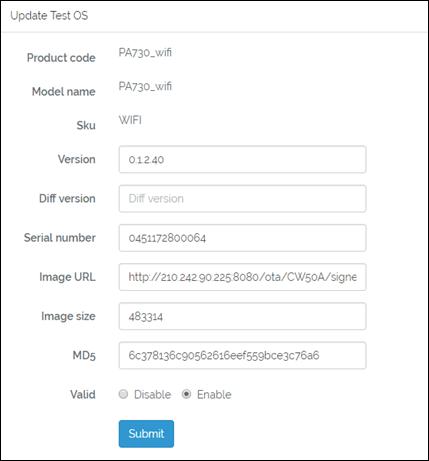
3.1.5. Manage test OS
Test Os is used for upgrade specified
device's OS image. You can Specify a device to update image by assigning the
field "Serial Number" for test purpose.
Administrator, super user and OS user can
add/update/delete test OS. Users can only access those devices that they have
access right defined in user's auth devices field.
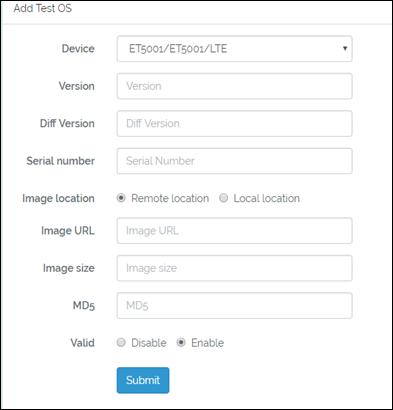
Add Test OS:
|
Fields |
Description |
Example |
|
Device |
Product
code/Model name/SKU to add OS image |
Ex: ET5001/ET5001/LTE |
|
Version |
Test OS image version |
Ex: 1.0.0.0 |
|
Diff version |
Differential OS image version |
Ex:0.9.0.0 |
|
Serial number |
Which
device with this serial number to upgrade this image |
Ex: 123456789123445 |
|
Image location |
Remote or Local location |
|
|
Image
URL |
Image
download address |
Ex: http://aa.bb.cc/dd.zip |
|
Image
size |
Image
size in KB |
Ex: 10231421 |
|
MD5 |
Image
MD5 |
Ex:1234567890123453425313143 |
|
Valid |
Image
disable or enable |
|
*Diff Version: If your Test OS upgrade
image is specified for some Version, you can assign this field.
*You can put test OS image in remote
location or local location. If you put test OS image in local location, system
will calculate image size and MD5 automatically. If you put test OS upgrade
image file in remote location, you have to fill up image size and MD5 according
to your OS upgrade image file.
Update Test OS information:
Update information of exists OS
upgrade image file. User interface is similar to Create OS.
Delete Test OS:
Just press Delete button to delete
related Test OS upgrade image file.